
This post is sponsored by The Home Depot. All opinions are 100% my own. Thank you for supporting the brands we truly love!
Office Before
When we moved into this house it was like a Crayola box. Every room was painted a different color and if you know me I’m not the colorful type.
Let’s not forget the weird overuse of IKEA bookcases that lined almost every wall in this house! I guess it’s true what some people say when they say, “you can never have enough storage space.”


I painted the walls and the ceiling the same color but a different sheen, ceiling flat and walls eggshell. By just adding a fresh coat of paint it made a world of difference.

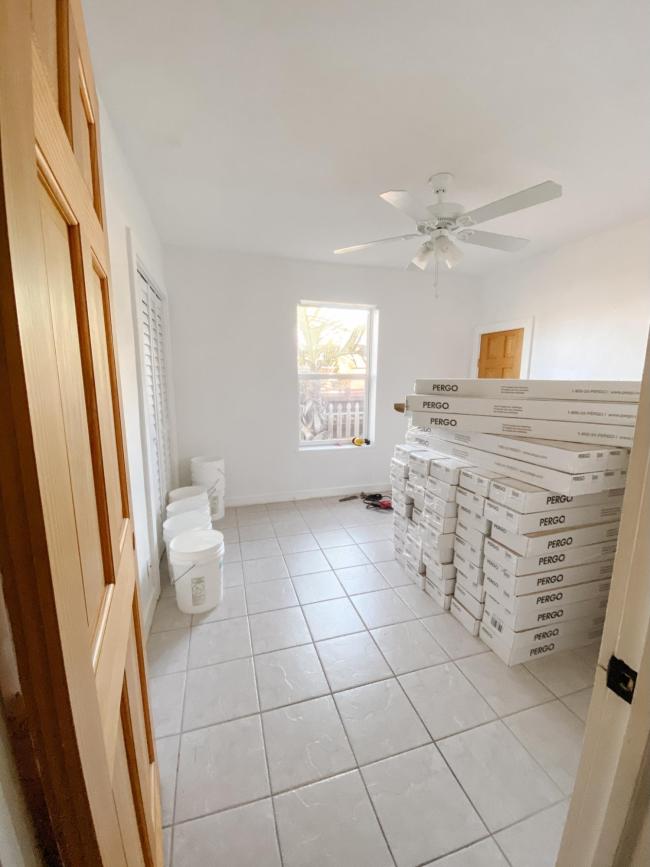
We cleared out the office and when our Pergo Defense+ Laminate Flooring was delivered we brought it inside to acclimate for 48 hours.
Since there’s less “free” space to just store things in this house, we plan to do one room at a time and play musical furniture and shuffle furniture into the finished rooms until we complete the whole house!
We don’t plan to lay the laminate in our bathrooms, laundry room or butler’s pantry since we’re wanting to tile. However, if you do plan to lay the Pergo Defense+ Laminate Wood Flooring in a “wet area” it’s completely safe because the flooring is waterproof. They have an underlayment called Pergo FloorMate which has superior moisture protection and sound insulation with more than 10 times the moisture vapor barrier.

It’s always been a dream to have white oak colored wood floors and we landed on the perfect sample, Pergo Defense+ in Biscuit Oak. If you missed how we decided on this color you can read more here.

If you live in Florida then this tile is no surprise this popular 12×12 Florida tile throughout our entire house. The great thing with laminate flooring is that it’s a floating floor so it can be installed over smooth, flat, dry surfaces: concrete, ceramic tile, vinyl and wood. However, we didn’t get so lucky.
We found out the flooring on the side of the house that was added some 20+ years ago has uneven floors, about a 2” difference in some places. Plus, having to dig a trench from our kitchen to the front yard by going through the slab made for another reason.
So we had to remove the tile in every room of the house to be able to level the areas that were uneven.

We found what I thought was an Easter Egg under our tile, terrazzo flooring! However, this southern California girl did not know terrazzo flooring this far south is as popular as boob lights in new construction homes.
Having Laminate Wood Flooring instead of terrazzo or tile was always the plan because that’s what fit our families needs the best. The Pergo Defense+ Laminate Wood Flooring is waterproof antimicrobial laminate approved for steam mopping which is perfect for kids, pets and our busy lifestyle.
Removing Tile to Lay Flooring
Removing tile to lay floating laminate wood flooring is only necessary if the flooring you’re laying the laminate over is damaged, uneven, or you have a personal preference.

How We DIY’d Laying our Laminate Wood Flooring
Step 1:
We removed all baseboards and door trim when we removed the tile. If you’re not removing your current flooring and laying right over existing you still need to remove baseboards and remove the bottom portions of the door frames so the flooring fits under.
Step 2:
After removing the tile and fixing any imperfections that were more than 3/16” deep we cleaned the office with a shopvac more than a few times. Then used our house vacuum for the last cleaning which was crucial.
Good prep is the key before laying any new flooring!

Step 3:
Since we removed the tile and were left with terrazzo flooring which is similar to laying flooring over concrete, we needed to use a moisture barrier under the flooring. Pergo Defense+ Laminate Wood Flooring comes with a 2mm attached foam underlayment already which reduces sound and for ease of installation.
It’s not a moisture barrier. If you are laying over concrete or in a “wet area” you need to use a moisture barrier like Pergo FloorMate or Polyethylene Film.

To adhere the vapor barrier into place we also used seam guard tape which is tape specifically designed to be used with laminate underlayment.
Step 4:
Once the vapor barrier was in place it was time to start laying the Pergo Defense+ Laminate Wood Flooring! We started a few feet away from the wall on the left hand side (looking at the wall) and started laying 3 rows and used spacers on each end of the wall.

We used a laminate floor install kit that comes with: a tapping block, spacers, and a metal pull bar. You’ll also need a rubber mallet and additional spacers that do not come with the kit.
To cut each end piece to size we used a square and miter saw. If you don’t have a miter saw there are some other ways you can also install laminate flooring using a utility knife or a laminate flooring cutter.
As we cut one end piece we used the unused piece to start the next row. While laying the flooring we had a few boxes open at a time to make sure we didn’t have any repeat patterns lined up too close to each other.
Typically laminate flooring comes in 8-16 repeating patterns, in some cases of laminate flooring you can have 2 of the same patterns in the same box. Laying the same pattern next to each other creates an unnatural look and makes it more noticeable repeat patterns are occurring.
Step 5:
After laying 3 rows of flooring we pushed the flooring a few feet meeting at the wall and adding in additional spacers. We continued to lay the flooring in the same manner, but made sure we were on the flooring we just laid and our back was to the starting wall.
We used the flooring boxes to help weigh down the laminate as we tapped them into place. This is helpful if you find that your flooring is moving or shifting a little as you tap each piece into place.

We took turns laying the flooring so we could both learn how to install it, because at some point he’d have to install part of the flooring by himself and so would I!
Step 6:
We finished most of the flooring with about ¼ of the flooring left to install. We needed to cut around a door frame that included a step down into a bathroom and a closet.
Learning how to cut around a door frame wasn’t difficult, but it was very tedious since our house was built in the 50’s. Some things are not built like I’m used to.

There should be no gaps around the door jamb, it should look seamless as if the door jamb was installed after the flooring was laid. Essentially you need a gap at the bottom of the door jamb that the laminate flooring will fit under.
The easiest way to lay the laminate under a door jamb is mark the height of the laminate along the door jamb. You can do this by lining up a scrap piece of laminate flooring and mark the height along the door jamb so you know how much to cut.
You can use a hand pull saw or a multi-tool both do the same job. The laminate flooring has to sit about ¾” under the door jamb so undercutting the door jamb will do just that.
Typically the door jamb will all pop out if it doesn’t like in our case. You can use a flat head screwdriver and hammer to chip out the door jamb pieces.
Our door jambs were extremely uneven in height so it was a little more tricky for us.


After undercutting the door jamb and cutting your laminate flooring to fit, tap into place like the other pieces of flooring already laid.
Step 7
Once the flooring was completed we removed our spacers to prep for baseboards. We decided to nix the trim around the doors because we wanted to maintain the Spanish and Mediterranean vibe we’re going for in this home.
The door jamb was not removed, just the finishing trim that was around the door to cover the door jamb.
TIP: When buying your baseboards at The Home Depot cut each end piece 1” longer than your needed measurements. The hand saw typically doesn’t give a clean cut in my experience so I use my miter saw to make clean precise cuts at home.

To install baseboards I used my 18g brad nailer and 2” brad nails, although a finishing nailer might be more delicate for the job and less visible with nail-heads.
Our newly installed Pergo Defense+ Flooring
Eeek, how good do these look! I still can’t believe we installed these ourselves and it was super easy! Pergo’s website gives such detailed instructional videos and customer service at the ready for any questions you might have during install.

Pergo Defense+ Flooring will definitely be our choice for future flooring needs!
A look at our new flooring in my office
We decked out the rest of the office with home decor from www.homedepot.com/decor and my jaw is still on the floor. We are so happy with how this space turned out!

Funny enough nobody knows we have a 3 bedroom house because my office has been a storage room for everything that wouldn’t be outside.


Get the Look
- Pergo Defense+ 7.48 in. W Biscuit Oak Antimicrobial Waterproof Laminate Wood Flooring
- Home Decorators Collection 60 in. Rectangular Patina 5 Drawer Writing Desk with Keyboard Tray
- LOLOI II Loren Charcoal/Multi 7 ft. 6 in. x 9 ft. 6 in. Traditional Polyester Runner Rug
- Brooklyn + Max Krause Contemporary Natural Jute Round Braided Pouf
- Trademark Innovations 11 in. x 7 in. Rectangular Seagrass Baskets with Lids (3-Set)
- Titan Lighting 7 in. x 3 in. Pin Stripe Bone Decorative Box
- Zentique Stoneware Distressed White Small Decorative Pitcher Vase
- LITTON LANE 22 in. Gold Metal Rustic Windchime
- A and B Home Kellnado Decorative Bowl
- Home Decorators Collection Eldridge – File Cabinet
- Home Decorators Collection Merwry 52 in. Integrated LED Indoor Matte Black Ceiling Fan with Light Kit and Remote Control
- BEHR ULTRA 1 gal. #75 Polar Bear Extra Durable Eggshell Enamel Interior Paint & Primer
- Vickerman 5 ft. Cotinus Coggygria Tree with Pot-Green
- Artistic Weavers Arthus Orange Throw Blanket
- Artistic Weavers Arthus Gray Throw Blanket
- Bulova Metal Case Table Clock with Contemporary numbers
- SAFAVIEH Oslo Caramel/Natural Upholstered Arm Chair
Supplies Used
- DEWALT ATOMIC 20-Volt MAX Cordless Brushless Oscillating Multi-Tool
- Vaughan 8.5 in. Pull Saw with Composite Handle
- Roberts 9 in. Flooring Cutter with 45 Degree Miter Guide
- DEWALT 15 Amp Corded 12 in. Compound Double Bevel Miter Saw
- Empire 7 in. Polycast Rafter Square
- Husky Folding Lock-Back Utility Knife
- Anvil 16 oz. Black Head Rubber Mallet
- Roberts Seam Guard 1-7/8 in. x 100 ft. x 0.005 in. Underlayment Tape Roll
- Roberts 120 sq. ft. 10 ft. x 12 ft. x 0.006 in. Roll of 6 mil Moisture Barricade Polyethylene Underlayment
- SimpleSolutions Laminate Installation Spacers
- Roberts Laminate and Wood Flooring Installation Kit
- Pergo FloorMate
Let me know if you have any questions about this project below!
For more behind the scenes on all of our DIY and home projects be sure to follow along with us on instagram. To see all of our inspiration and sneak peaks for upcoming projects be sure to follow along on pinterest.
